
Cut Faster With Clippers Without Losing Quality
Learning how to improve your clipper cutting speed starts with watching where your time goes during a haircut. The best time to do this is while you’re still in training, but it’s never too late to check your own speed.
Very little of it goes to the clippers cutting hair. Most of it goes to reaching for a guard, stepping around the chair, doing a pass that did not remove anything, a misunderstanding of hair growth, areas of the head, and going back to fix a section you left behind.
Each of those is a repeatable motion, which means you can shorten it with practice. This article breaks a clipper haircut into its parts and shows where beginners lose seconds, so you can cut faster while the result looks cleaner.
Why speed is a business skill
A barber’s workday is built from turnover production, Most barbers today prefer to be appointment base therefore being on time is key. The haircut that runs long pushes back everyone behind it. A late chair means a waiting client, and a waiting client notices. If you cut a little faster at the same quality, you can fit more clients into a day while spending quality time on the details that people pay for.
Speed also affects consistency. A cut done with the same motions in the same order comes out the same way each time, so clients get the result they liked last visit. That is what lets you run a chair like a business rather than treat each haircut as a new puzzle.
Quality comes first, and that is why the order of this article matters. The aim is to remove wasted motion, never to hurry the careful parts. If you are still building your fundamentals, the post on the core skills a new barber needs before charging a fee covers what should be solid before you work on pace.
Set up your station so your hands never hunt for anything
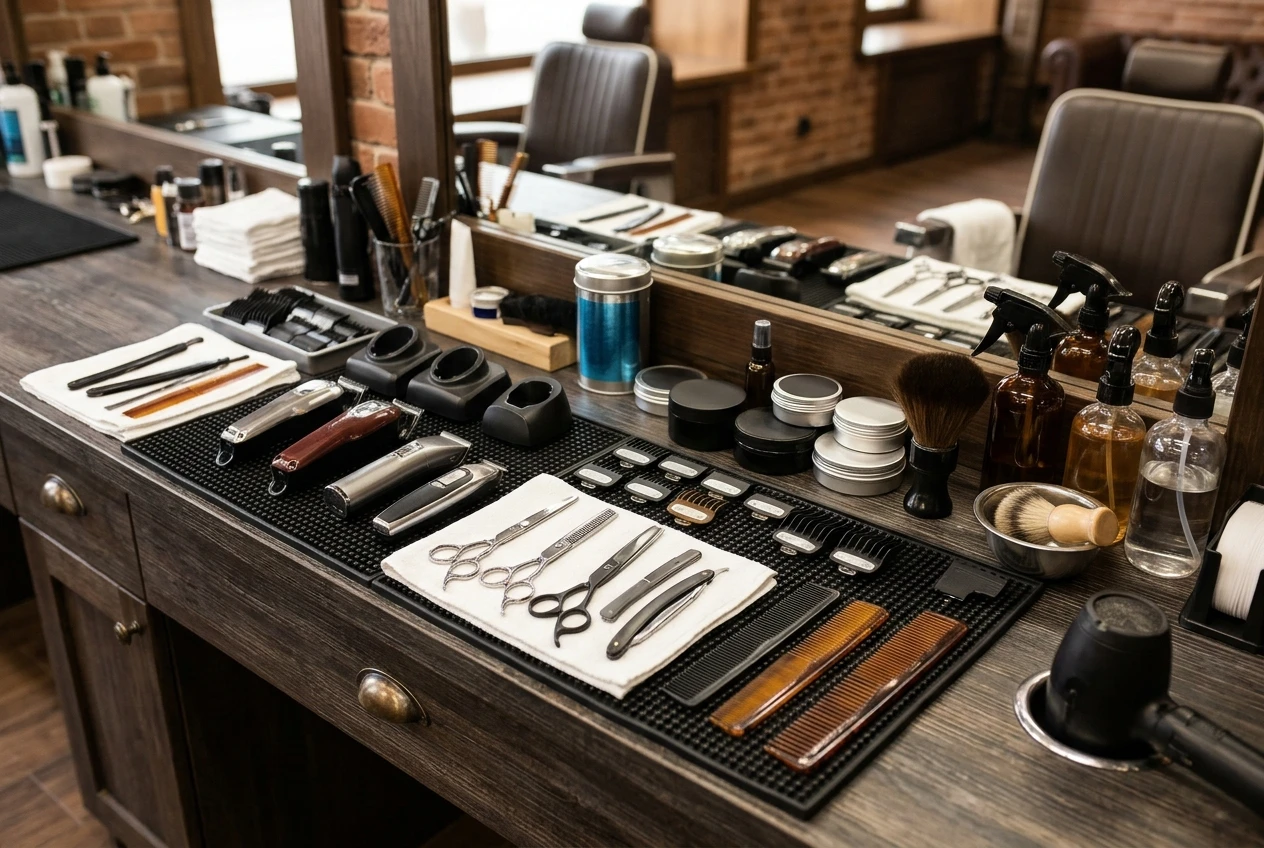
Fumbling for tools is the easiest time I have ever gotten back in my own chair, because it needs no new skill. Here is what I do. I walk through a haircut in my head and list every item I touch: cape, neck strip, clippers, guards, comb, spray bottle, trimmer, shears, duster, mirror, product. Then I give each item one fixed spot, and you should too.
A few setup habits make the biggest difference:
- Keep guards in numerical order in one holder or tray, so you can grab the one you want without reading each number.
- Put the tools you use most within one arm’s reach of your dominant hand, and the ones you use least a little further away.
- Place your comb, spray bottle, and trimmer in the same position every day, so your hand learns where they are without your eyes checking.
- Check your clippers before the client sits down: blades oiled, battery charged or cord ready, and the guard you will start with already within reach.
My test is simple. If I ever catch myself looking down at my station to find something mid-cut, that item needs a better position. Tool placement matters more than which tools you own, though the tools post covers gear choices that can make a station easier to organize.
Hold your clippers so you reach the areas being cut with ease
A tense grip slows you down because it tires your hand and makes your movements shorter and less controlled. Hold the clippers firmly enough to steer them and no tighter. Your forearm, wrist, and hand should form a fairly straight line, with the wrist close to neutral instead of bent sharply up or down.
Practice switching guards and adjusting a lever with the same hand holding the clippers, so you do not set the tool down or use your free hand more than necessary. Your free hand has its own job: holding the comb, guiding the ear, tilting the head, or stretching the skin. If it is doing something useful during every pass, the cut moves along.
Pay attention to the cord too, if you use corded clippers. A cord that catches on the chair or wraps around your arm makes you stop. Position it so it falls away from your working hand, and see whether a cordless setup suits the way you work.
Work in a fixed order: the sequence that stops you doubling back
Clipper work covers the sides and back, and it leads into clipper over comb, which finishes with scissors. Getting faster with clippers means knowing when they aren’t the right tool for the job.
Cutting with intent keeps you from doubling back, which is the biggest time loss in most beginner haircuts. You finish the right side, move to the left, and then the back. Now majority of today’s beginning barber are stuck on the internet. Punching hard lines wt trimmers then chasing a line to remove. Leaving a haircut left without balance and conformity. Usually that happens because you didn’t remove enough weight for a proper blend, for fear of cutting too high.
A fixed order solves this. Every section gets visited once, in the same sequence, every time. As a beginner learning how blending works, it’s best to remove the weight down to a workable length first. The easiest line to get out of a haircut is the line you never put in.
There is no single correct sequence, and I’m not saying a hard line is wrong when you need to blend it out. It takes a little more skill and experience to do so. What matters most is that you pick an order and repeat it until it becomes automatic. That alone will cut your time dramatically, and it carries over to any style you learn in the shop.
Here is the order I use for a mid bald fade with scissor work on top.
- Drape the client and check the head shape and hair direction before any clipper touches hair. Jane a discussion on desired outcome and agree on what will work. This not only determines the grain and allows me to know how I will approach the cut, but I also know exactly what my customer wants. Read the 3 c’s of cutting for a clearer understanding on the approach I take.
- If scissors are to be used on top begin to blend down from the crest area of the head. Use your biggest blade/guard. A visual demonstration will serve much better for this explanation follow me on instagram for this to be further explained. @shan_won_the_nu_1
- Step down to shorter guards until you’ve reached the desired area of your blend.
- Blend the transition area (crest area)with the comb and clippers/shear over comb.
- Cut the top to length using finger work.
- Detail the neckline, sideburns, and around the ears.
- Do a final check from every angle, then clean up.
Whatever order you choose, finish each stage before moving on, and finish one area fully before the other so you can compare. What you do on one side isn’t always the case so be sure to check and have a clear understanding of the hairs density. A fixed sequence also leaves you free to think about the client’s head rather than trying to remember what comes next.
Move your body, not just your hands
Many beginners stand in one spot and stretch their arms to reach around the head. That slows the cut and tends to produce uneven lines, because reaching distorts your angle. Move your feet, and keep the clippers at a comfortable working distance from your body. The mirror is a tool to check for balance throughout your haircut. USE IT!
Use the chair too. Raise it for the sides and nape so you are not bending over, then lower it for the top so your arm is not lifted high. Small height changes save your back and shoulders and keep your wrist in a better position.
A few positioning habits are worth building:
- Step around the chair in a consistent direction so your movement becomes a pattern.
- Stand where you can see the line you are cutting rather than guessing at it.
- Turn the client’s head with your free hand instead of leaning across them.
- Keep your elbows relatively close to your body when you can.
Better positioning removes the corrective passes that come from working at awkward angles. It also makes the cut look the same from the front, back, and sides, which is where a polished result shows.
Make fewer passes: read hair direction and take the right amount each time
Every pass that does not remove hair is wasted time. Beginners often make extra passes because they are unsure whether they have taken enough, so they go over the same area again and again. Be intentional with your cuts and move on to the next step.
Start by reading the direction the hair grows. Hair at the crown, the nape, and around the hairline often grows in different directions, and cowlicks can change how hair lies and how it cuts. Run your comb through the section before cutting to see which way it falls and how thick it is.
If you find yourself repeating a pass, ask why. Was the hair not controlled? Was the guard wrong for that section? Answering that after each cut teaches you more than simply cutting more heads.
Drills to build speed away from paying clients
Clients are the wrong place to practice speed, so build it where mistakes are free. A mannequin head, a willing practice model if your school or shop allows it, or even dry runs with the clippers off all work.
Try these:
- Setup drill: Arrange your station, then clear it and arrange it again. Time yourself and aim for a smooth, consistent routine, not a record.
- Guard change drill: Practice swapping through your guards in order until you can do it without looking.
- Sequence run-through: Move through your cutting order on a mannequin with the clippers off, stepping around the chair and placing your hands as you would in a real cut.
- Single-section drill: Cut one section, such as the back taper, repeatedly and compare the result each time.
- Recorded cuts: Film a practice cut from a fixed angle and watch for pauses, repeated passes, and reaching. Video shows habits you cannot feel while working.
Keep notes on your times and on what slowed you down, so you can see whether you are improving. Practice the slow, correct version first and let speed come from repetition. If a drill makes you sloppy, slow it down until it is clean again. Analyzing your work with film is the best way to find where you’re wasting time.
Know when to slow down: speed checks that protect your quality
Some parts of a haircut deserve more time, and cutting them quickly costs you more than it saves. The blending zone in a taper, the neckline, and any line-up work around the hairline are places where small errors are visible and hard to hide. Take your time there.
Build short checks into your routine so that speed never becomes carelessness:
- Compare both sides in the mirror before you finish, looking for symmetry in height and length.
- Run a comb through the blended areas and look for lines or steps in the transition.
- Look at the cut from the front, sides, and back, since each view shows something different.
- Ask the client whether the length is what they wanted before the final cleanup.
- Pay attention to client comfort, such as skin irritation from heat or tugging from dull blades.
Measure your speed by the finished result, including any time spent fixing. A cut that finishes early and then needs correction was not faster. If your corrections are shrinking while your total time drops, your workflow is improving.
Keep building your skills with the community
Faster clipper work comes from organized stations, a fixed sequence, good positioning, and practice drills, and all of these can be improved one at a time. Pick the one that costs you the most time right now and work on that first.
If you want more help with the craft and the business side of barbering, join the community here and get notified when the beginner barber ebook launches. For gear that supports a faster workflow, see the arsenal of tools post.